
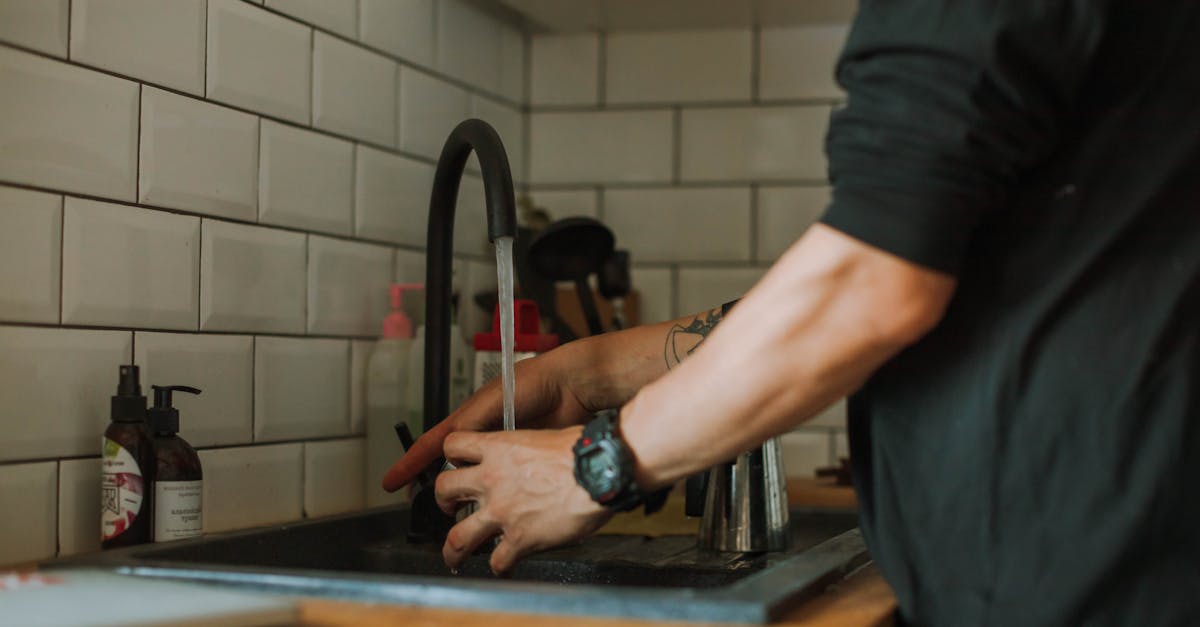
A DIY backsplash installation costs $75–$200 in materials and takes one weekend. The same job runs $400–$1,200 if you hire it out — so you’re looking at real money for what’s honestly an achievable first tile project. I’ve installed backsplash in three rental units and my own place, and the one I worried about most (my first attempt) ended up looking great. The one I rushed through because I “knew what I was doing by then” has a grout line that wanders, and I see it every morning while making coffee.
This is a project where precision matters more than speed. If you can measure twice and cut once, follow a chalk line, and accept that thinset has a learning curve, you can tile a backsplash. The cost-per-hour is low, the visual impact is high, and it’s one of the cheapest ways to make a dated kitchen feel updated.
What you’ll need
Tools:
- Notched trowel (1/4” for standard subway tile)
- Grout float (rubber)
- Wet saw or angle grinder with diamond blade (wet saw preferred — Harbor Freight models run ~$100–$150)
- Tile spacers (plastic, matched to your desired grout line width)
- Laser level or 4-foot bubble level
- Chalk line
- Sponges, buckets, mixing paddle (drill attachment)
- Drop cloth and painter’s tape
- Safety glasses, N95 dust mask, work gloves
Materials (for typical 15 sq ft single-wall backsplash):
- Ceramic or porcelain tile: 15–20 sq ft (buy extra for cuts and mistakes)
- Tile adhesive (thinset mortar): 4–5 lbs
- Grout: 2–3 lbs — sanded for joints wider than 1/8”, unsanded for joints 1/8” or narrower (see grout selection below)
- Waterproofing membrane or sealant (for countertop seam)
- Grout sealer (penetrating)
- Silicone caulk (color-matched, for corners)
- TSP cleaner or heavy-duty degreaser
Prerequisites:
- Wall must be solid (drywall or plaster), clean, and properly prepared
- Countertop installed and level (or close to it)
- Outlets and switches accessible (you’ll tile around them)
Before you start
Kitchen backsplash tile installation is cosmetic work and typically doesn’t require a permit, but if you’re unsure, check with your local building department. The main safety concern is tile cutting — wet saws and grinders throw ceramic dust and shards, so wear eye protection and a mask rated for dust. Cut outdoors or in a well-ventilated area.
Wall preparation is where most DIY backsplash failures start, even if they don’t show up until months later. ANSI A108.02 specifies substrate requirements for residential tile installation: the surface must be structurally sound, clean, dry, and free of contaminants that prevent adhesion. If your wall is glossy, has old wallpaper residue, or shows grease buildup (common behind stoves), clean it thoroughly with TSP solution, rinse completely, and let it dry. For glossy or non-porous surfaces, lightly sand or apply a bonding primer — thinset won’t stick to slick paint or residue. To test adhesion readiness, press a strip of duct tape firmly to the wall and pull it off; if paint or finish comes with it, keep prepping.
Protect your countertop with drop cloth and tape — thinset is messy and sets fast.
Step 1: Measure and plan your layout
Measure the wall area you’re tiling. Most backsplashes run from the countertop up 18–20 inches to the bottom of the cabinets, though some stop at 4 inches. Sketch your layout on paper and decide where the tile edges will land. If you end up with slivers less than half a tile width on the ends, adjust your starting position so the cut pieces are equal on both sides — it looks more intentional.
This dry-run saves you from the mistake I made on my second backsplash, where I started in the middle without checking and ended with a 1-inch sliver on one edge that looked ridiculous.
Step 2: Set a level baseline
Countertops are rarely perfectly level, so don’t assume yours is. Use a laser level or 4-foot bubble level to find the lowest point of your countertop, then snap a horizontal chalk line just above it. This line marks the top edge of your first row of tile. Starting from a level line — not the countertop itself — keeps your grout lines straight.
Step 3: Apply waterproofing at the seam
The backsplash-countertop junction is where water exposure happens most — splashing from the sink, steam from cooking, condensation. Grout alone won’t stop moisture from wicking behind the tile at this seam. Before you set any tile, apply a waterproofing membrane or liquid sealant along the countertop edge where the first row of tile will sit. Schluter and TCNA both specify moisture barriers at vulnerable transitions; the product can be a peel-and-stick membrane strip, a trowel-applied waterproofing compound, or a bead of waterproof sealant rated for tile installations. Let it cure per manufacturer instructions (usually 1–2 hours).
I skipped this step on my first two backsplashes because I didn’t know it mattered. Both developed grout cracks at the countertop seam within a year, and one started showing moisture staining on the drywall behind the tile. The third install — where I used a membrane strip — is five years in and still solid.
Step 4: Dry-lay the tile pattern
Arrange your tiles on the countertop with spacers between them, exactly as they’ll appear on the wall. This confirms how your cuts will fall and whether you need to adjust the starting position. Mark tiles that need cutting with a grease pencil. Measure twice; cutting tile is loud and you don’t want to do it more than necessary.
Step 5: Cut the tiles
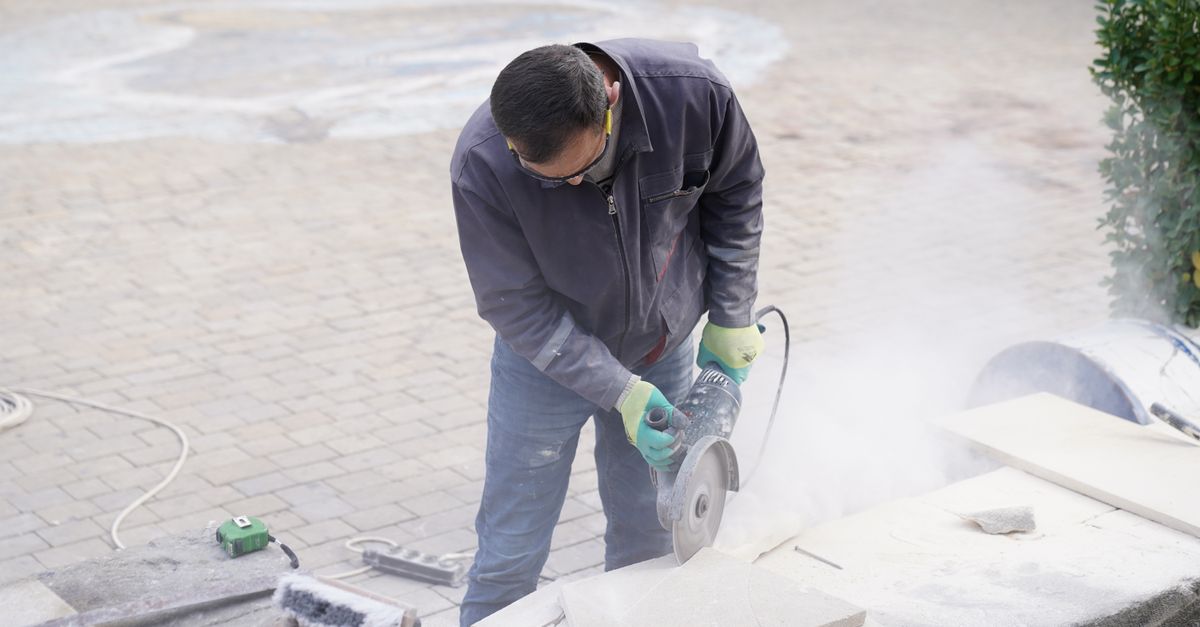
For straight cuts, a wet saw is faster, cleaner, and safer than an angle grinder. I bought a Harbor Freight wet saw for $120 four years ago and it’s still running. Let the blade do the work — don’t force the tile through. For notches around outlets, make intersecting cuts with the wet saw or use a grinder with a diamond hole saw. Wear a dust mask and safety glasses even if you think the cut will be quick.
Step 6: Mix and apply thinset
Mix thinset mortar in small batches — it sets in 30–45 minutes, and you don’t want to rush. The consistency should be like peanut butter: spreadable but not runny. Follow the manufacturer’s mixing instructions on water-to-powder ratio; Laticrete and other thinset manufacturers specify precise ratios because too much water weakens the bond and too little prevents proper troweling.
Use the flat side of your trowel to spread a thin base layer on the wall, then comb over it with the notched side at a 45-degree angle to create even ridges. Those ridges ensure the tile back is fully covered and aligned properly. Only spread as much thinset as you can tile in 15 minutes. If it starts to skin over, scrape it off and reapply — you need a tacky surface for the tile to bond.
Step 7: Set the tiles
Press each tile firmly into the thinset, starting at your baseline and working upward. Give it a slight twist as you set it to ensure full contact. Use spacers between every tile to keep your grout lines consistent. Check your work with a level or straightedge every few rows — small height differences (called lippage) get magnified across a straight line, and you’ll see them every time you look at your backsplash.
I didn’t check level on my first install until I was six rows up, and by then I had a noticeable dip in the middle. I pulled four tiles and reset them, which wasted an hour and some thinset. Don’t skip this step.
Step 8: Let the thinset cure
Walk away for 24 hours. I know it looks done, and I know you want to grout immediately, but thinset needs time to cure or your tiles may shift. Follow the manufacturer’s guidance on your specific product — most wall tile adhesives say 24 hours, but some say longer.
Step 9: Mix and apply grout
Choosing your grout: The width of your grout joints determines which type you need. Standard subway tile with 1/16” spacers requires unsanded grout; wider joints (anything over 1/8”) need sanded grout. ANSI A108 and grout manufacturers like Mapei specify this because sanded grout resists shrinkage in wide joints, while unsanded grout provides a smoother finish in tight joints and won’t scratch polished tile surfaces. Check your tile packaging or measure your spacer width if you’re unsure.
Mix grout in small batches to the consistency of thick frosting. Use the grout float held at a 45-degree angle, pressing grout into the joints and working diagonally across the tiles (not parallel to the grout lines — that pulls grout back out). After 30–45 minutes, when the grout starts to firm up, hold the float at 90 degrees and sweep away the excess.
Wait another hour or two until the grout hazes over, then make a second pass with a damp sponge. Don’t over-wet the sponge — you’ll weaken the grout. I learned this the hard way when my first backsplash grout turned chalky and dusty because I scrubbed it with a soaking-wet sponge.
Step 10: Caulk the corners and cure

Use silicone caulk (not grout) at inside corners where the backsplash meets the wall or countertop. Grout is rigid and will crack at those joints; caulk flexes. Most grout needs 72 hours before light splashing and 7 days before full water exposure. If you need to use the sink before then, tape up a temporary plastic splash guard.
After 2–3 weeks, apply a penetrating grout sealer if you used cement-based grout. This protects against staining, especially important near the stove where grease splatter happens.
Verify it worked
Run your hand across the tile surface — it should feel flat with no sharp edges or loose tiles. Grout lines should be uniform in width and color. Wipe down the backsplash with a damp cloth; if grout dust comes off easily, you over-watered during cleanup (it’ll still work, just be gentler next time). The real test is a few weeks of cooking and cleaning — the backsplash should stay put and clean up easily.
Troubleshooting
Problem: Tiles are slipping down the wall while the thinset sets. Your thinset is too wet or you’re tiling too fast. Mix it thicker next batch, and only tile 3–4 rows before pausing to let them set slightly.
Problem: Grout lines are uneven or wandering. You didn’t use spacers consistently, or you eyeballed it. Pull the tiles before the thinset sets fully and reset with spacers. If the thinset has cured, you’re stuck with it — this is why dry-laying matters.
Problem: Grout is cracking at corners or the countertop seam. You used grout instead of caulk at change-of-plane joints, or you skipped the waterproofing step at the countertop. Grout doesn’t flex; it’ll crack where walls meet or where backsplash meets countertop. Dig out the grout and recaulk with silicone. If moisture is wicking behind the tile, you may need to remove the bottom row, apply waterproofing membrane, and re-tile.
Problem: Tile cuts are chipping on the edges. Your blade is dull or you’re cutting too fast. Replace the diamond blade (they’re $20–$40) and slow down the feed rate.
Kitchen backsplash cost breakdown
DIY materials cost:
- Tile: $50–$150 (basic ceramic subway to mid-range porcelain)
- Thinset and grout: $15–$30
- Waterproofing membrane/sealant: $10–$25
- Sealers and caulk: $10–$20
- Total: $85–$225 (add $100–$150 one-time if you’re buying a wet saw)
Professional install cost: Labor runs $8–$15 per square foot depending on your region. For the same 15 sq ft backsplash, that’s $120–$225 in labor plus material markup, so you’re looking at $400–$1,200 total.
Your savings: $300–$1,000 per wall. Even if you factor in tool purchases, you’re still ahead after one project. The backsplash won’t recoup 100% at resale, but realtors consistently cite it as a high-impact first-impression upgrade — it’s the cheapest way to make a kitchen feel updated.
If you’re comparing tile types, ceramic vs porcelain backsplash tile breaks down cost, durability, and aesthetics for both ceramic and porcelain options.
Product recommendations disclosure
This article includes product and tool recommendations. FixerDaily may earn a small affiliate commission if you purchase through links in this guide, at no additional cost to you. We only recommend tools and materials that deliver good value and safety.
When to call a professional
- Complex patterns (herringbone, intricate mosaics): Layout precision matters, and uneven grout lines show up fast in geometric patterns.
- Large areas (multiple walls, full kitchen): Professional-grade tools and time efficiency make a difference when you’re tiling 50+ square feet.
- Curved or textured walls: Trowel technique and adhesive coverage require experience to avoid voids and lippage.
- Existing tile removal: Demoing old backsplash is dusty, time-intensive, and risks damaging drywall. Pros have better extraction tools.
- High-end natural stone (marble, limestone, granite): These materials need special adhesives, sealing, and moisture management that’s outside hobbyist scope.
FAQ
Do I need to grout the backsplash?
Yes. Grout fills the joints between tiles, prevents water from getting behind the tile, and gives the installation a finished look. Skipping grout leaves gaps that collect grime and let moisture reach the wall. Use unsanded grout for joints 1/8” or narrower (standard subway tile with tight spacing) or sanded grout for joints wider than 1/8”.
What tiles work best for kitchen backsplash?
Ceramic subway tile is the most beginner-friendly option — it’s affordable ($30–$60 per sq ft), widely available, and easy to cut. Porcelain tile is denser and more durable but slightly harder to cut and more expensive. Mosaic tiles on mesh sheets hide minor alignment errors and add visual interest, but you’ll have more grout joints to maintain.
How do I cut backsplash tiles?
Use a wet saw for straight cuts — it’s faster, cleaner, and safer than an angle grinder. For notches around outlets, make intersecting cuts with the wet saw or use a grinder with a diamond hole saw. Always wear safety glasses and a dust mask; tile dust is no joke.
Should I tile behind the stove?
Yes, especially if you have a slide-in range. Tile protects the wall from grease splatter and heat, and it looks more finished than leaving a gap. If you’re tiling behind a freestanding stove, you can stop the backsplash at the stove edges, but running it the full width of the wall looks more cohesive.
Backsplash installation is one of those projects where the first three rows feel slow and uncertain, and then you hit a rhythm and wonder why you waited so long to try it. Take your time on the layout, don’t rush the thinset, and resist the urge to grout early. The money you save is real, and the satisfaction of pointing at your kitchen and saying “I tiled that” outlasts the sore knees.
If you’re planning a full kitchen refresh, pair this with How to Paint Kitchen Cabinets in 6 Steps for a complete remodel feel at a fraction of the cost. For broader home-upgrade budgeting, how to save on kitchen upgrades walks through the ROI math on DIY projects versus hiring out.